Trail cameras are the hunter’s secret weapon—silent, tireless, and packed with potential. When used correctly, hunting camera tips that focus on placement, settings, and maintenance transform random snapshots into a strategic intelligence network. But too many hunters mount their cameras haphazardly, only to return weeks later to blank SD cards, false triggers, or worse—missing the buck of a lifetime.
The difference between frustration and success? Strategy. This guide delivers field-tested, expert-backed hunting camera tips that turn your trail cam into a high-yield scouting tool. From optimizing camera angles to outsmarting false triggers and leveraging real-time cellular data, you’ll learn how to place, configure, and maintain your gear for maximum results—no matter the season or species.
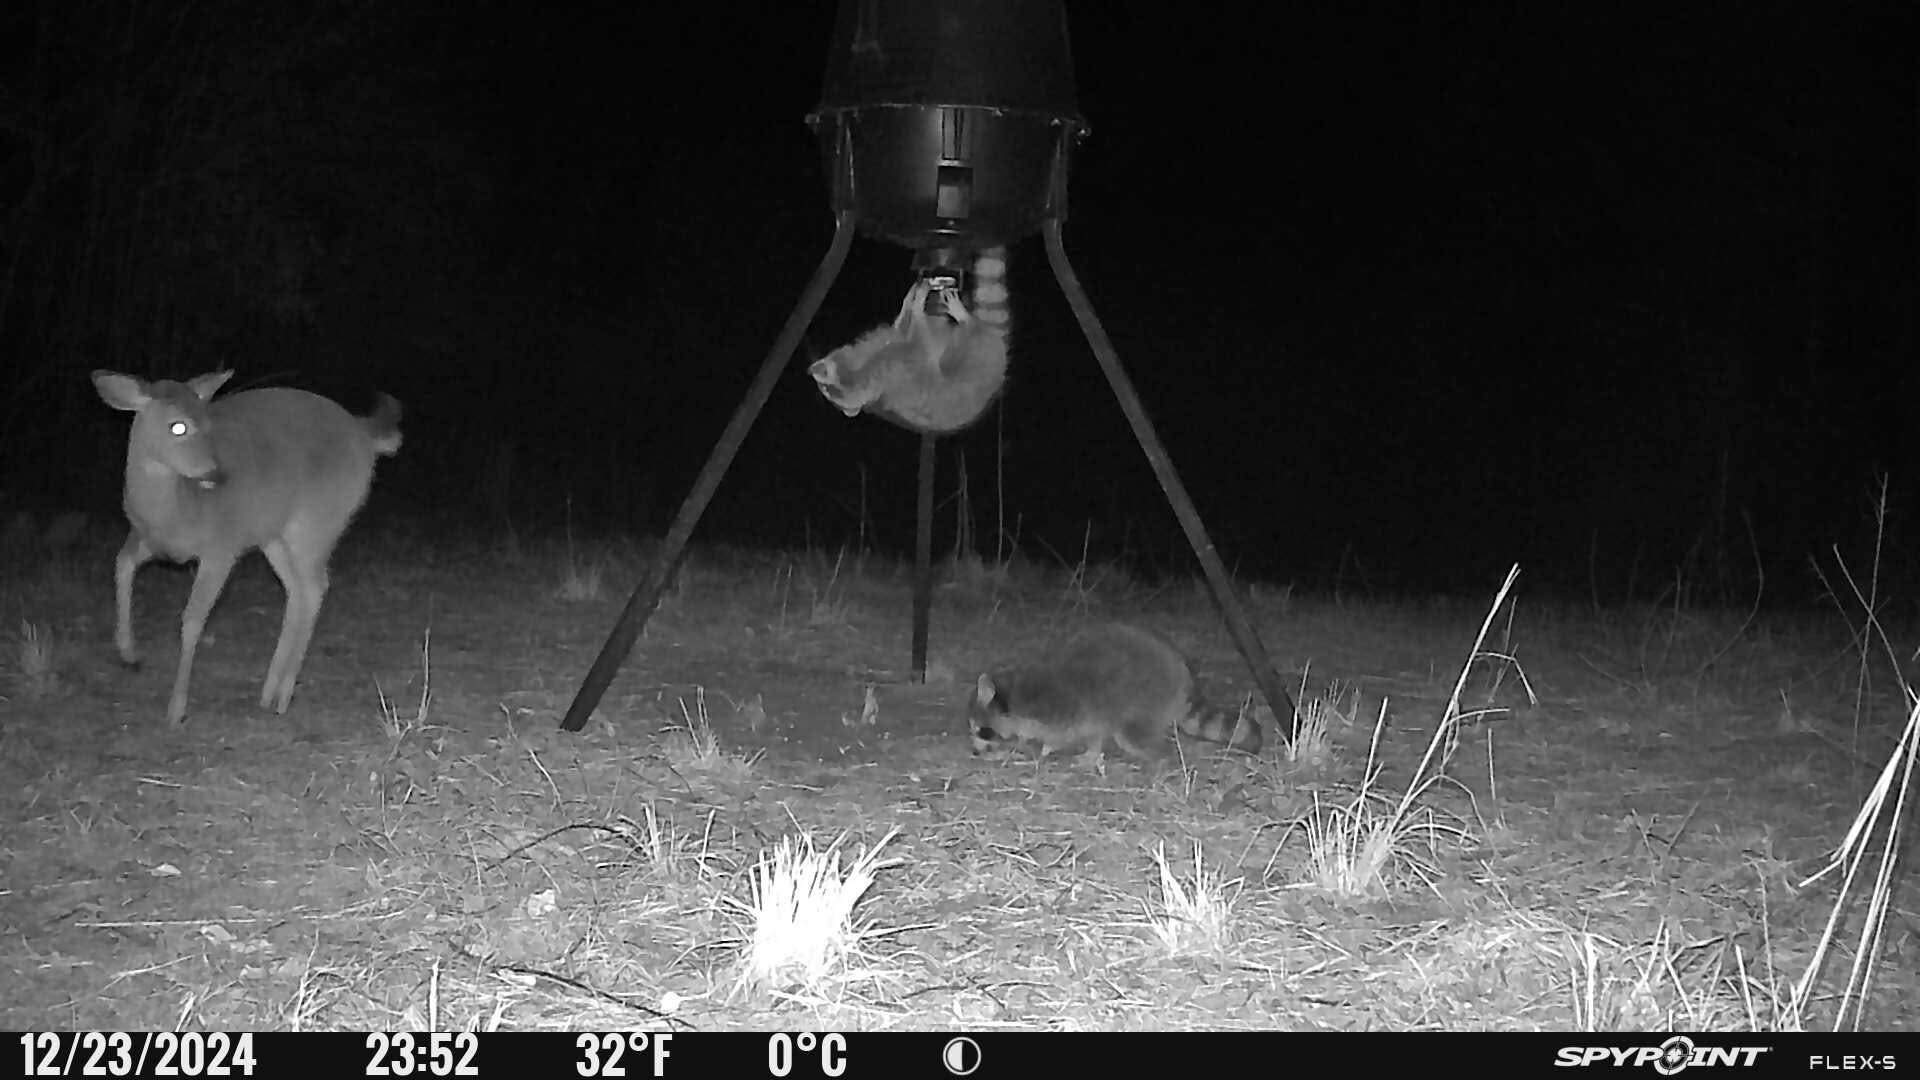
Target the Right Zones: Where Animals Naturally Gather
A perfectly configured camera in the wrong location is useless. Focus on high-traffic biological hotspots where animals are guaranteed to pass.
Focus on Food and Water Sources
Deer, turkeys, and predators follow predictable patterns driven by hunger and thirst. In early season, acorn-dropping oaks, berry thickets, and agricultural field edges are magnets for deer. Set cameras 10–30 yards from these zones, angled toward likely approach routes.
Water sources are equally powerful. Creeks, ponds, and wallows attract animals year-round—especially in summer droughts or winter thaws. Animals slow down to drink, giving your camera time to capture clear, full-body shots. Even a small rain-filled depression can become a traffic hub.
Exploit Natural Travel Corridors
Deer are creatures of terrain. They follow ridges, saddles, and drainages—natural funnels that compress movement. Place cameras where two habitat types meet, like woodland-to-field transitions or dense brush bordering open areas.
These edge habitats offer security and access. Deer feel safe in thick cover but want visibility into open feeding zones. Mount your camera just inside the woods, facing outward, and you’ll catch deer staging before dark—prime time for mature bucks.
Scout Staging Areas, Not Just Food Plots
Mature bucks rarely walk into fields during daylight. Instead, they stage in thick cover 30–100 yards away, waiting for darkness. Look for dropped tars, fresh rubs, or well-worn tracks leading toward food sources—these are signs of staging zones.
Use a mapping app like OnX to identify pinch points between bedding and feeding areas. These natural funnels are goldmines for camera placement.
Increase Dwell Time with Smart Attractants
More time in front of the lens means better photos. Use legal, low-impact attractants to make animals pause.
Try the Spit-on-Stick Trick
One of the simplest and most effective hacks: spit on a stick and place it in a trail. Bucks investigate foreign objects—and often lick or nuzzle them. This bait-free method draws curiosity without violating regulations. Field reports show bucks returning to the same spit stick multiple times.
Use Scent Wicks and Mock Scrapes
Hang scent wicks from head-high branches near your camera. Doe-in-estrus, buck urine, or even vanilla extract (a surprisingly effective cover scent) can trigger investigation. Pair this with a mock scrape—clear a patch of ground and drape an overhanging branch with scent.
During the rut, bucks revisit scrapes every 2–3 days. A camera aimed here can capture multiple bucks over weeks.
Add Mineral Blocks and Water
Mineral licks attract bucks in spring and summer for antler growth. They’re legal in more areas than bait and provide long-term traffic. Pair with a nearby small water source—even a shallow depression filled with rainwater—to slow animals down.
Warning: Always check local baiting laws. In many states, corn and grain are illegal for hunting purposes, even off-season.
Optimize Camera Height and Concealment

Your camera doesn’t have to be at eye level. Creative mounting boosts stealth and photo quality.
Mount Low for Natural, Unspooked Shots
Place cameras 0–12 inches off the ground, angled slightly upward. Animals don’t expect danger from below, so they’re less likely to spook. Use rocks or logs to shield the lens from mud.
You’ll get intimate, close-up shots of hooves, heads, and antlers. Just remember: low mounts need frequent cleaning after rain or snow.
Elevate High for Security and Coverage
On public land or near trails, mount your camera 6–10 feet high. This reduces theft and keeps it out of reach of bears and hikers. Angle it downward using a support stick or slack in the strap.
High mounts also reduce glare and improve field of view in open areas.
Hide in Unconventional Spots
- Under rotten logs: Carve a small cavity and tuck the camera inside. Cover with leaves.
- In corn stalk bundles: Wrap straps around standing corn for instant concealment.
- On multiple saplings: Tie 3–4 small trees together to create a stable mount in brushy areas.
Expert Move: Use a dummy camera near a mock scrape to distract thieves. Place the real camera 15 yards away, high and hidden, linked via wireless transmission.
Avoid Glare with Smart Orientation
Bad lighting ruins even the best-placed camera. Position wisely to avoid washed-out images.
Face North for Even, Diffused Light
Never point your camera east or west—sunrise and sunset cause severe glare. Avoid south-facing positions in open areas, where midday sun blasts the lens.
North-facing setups receive consistent, diffused light. In forested areas, this means fewer overexposed backgrounds and clearer rack shots.
Match Light Conditions
Don’t place your camera in deep shade while shooting into a bright field. The sensor struggles with high contrast, resulting in black silhouettes or blown-out backgrounds.
Instead, position the camera so both the lens and target area are in similar light—either both shaded or both in open light.
Field Test Tip: Walk through the detection zone with a backpack at deer height to test framing and lighting before final mounting.
Angle for Maximum Detection and Full-Body Shots
How you point the camera affects trigger success and photo quality.
Set at a 45° Angle to the Trail
Mount the camera at a quartering angle down the trail, not perpendicular. This increases the time an animal spends in the detection zone—especially critical with slower trigger speeds.
A deer walking across the sensor field triggers faster than one walking directly toward or away from the lens.
Avoid Head-On Placement
Frontal shots often miss antler details or cut off the head. A 45° angle captures full-body profiles and rack symmetry.
Use a support stick to fine-tune the downward angle, especially on high mounts.
Prevent False Triggers and Obstructions
Nothing wastes battery and memory like false shots from swaying grass.
Trim Vegetation in the Detection Zone
Cut back branches, tall grass, and vines within 20–30 feet of the camera. Even slight movement in wind can trigger hundreds of blank photos.
Use clippers or a small saw during setup and maintenance checks.
Test the Field of View Before Locking In
Walk through the trail at deer height (use a backpack) to verify:
– No head-cutting (top of deer clipped off).
– Clear line of sight.
– Full body capture at typical walking distance.
Adjust height or angle as needed.
Customize Camera Settings for Your Goals
Default settings waste power and miss shots. Customize for your location and goal.
Use Photo + Video Mode Strategically
Enable Photo + Video when:
– Monitoring food plots with multiple deer.
– Scouting elk or bear trails where animals follow at a distance.
– Using cellular cameras—review thumbnails, then request video if a buck appears.
Videos reveal animals outside the frame—a trailing buck, for example, that never triggers the sensor.
Battery Tip: Limit video length to 10–15 seconds to conserve power.
Set Trigger Speed and Delay Correctly
- Fast trigger (0.2–0.5 sec): Essential on trails and funnels during rut.
- Slow trigger: Acceptable at mineral sites or bait piles where animals linger.
- Trigger delay:
- 0–10 seconds on trails for back-to-back captures.
- 2–5 minutes at bait to prevent memory overload.
Adjust Sensitivity by Season
PIR sensors detect heat differentials. In hot weather, deer blend into ambient temps—increase sensitivity.
In windy areas or cold fronts, lower sensitivity to avoid false triggers from blowing leaves.
Pro Insight: In summer, set sensitivity high at field edges where deer are farther away. In winter, reduce it in brushy areas with constant movement.
Extend Battery Life with Lithium and Solar

Dead batteries mean missed opportunities. Optimize power from day one.
Use Lithium Batteries Only
Energizer Ultimate Lithium batteries last 3–5x longer than alkalines. They work in temperatures down to -40°F and resist leakage.
One set can capture 20,000+ images vs. 7,000 from alkalines.
Never use rechargeable NiMH batteries in cold weather—they fail fast.
Add Solar or External Power
For long-term deployments:
– Use solar panels linked to your camera.
– Connect 6V or 12V external batteries in lock boxes.
– Ideal for cellular cameras that transmit frequently.
Conserve Power with Smart Settings
- Increase trigger delay at bait sites.
- Limit cellular transmissions to 1–2 per day.
- Use desiccant packs inside the battery compartment to reduce moisture-related drain.
Manage SD Cards Like a Pro
A corrupted or full card ruins everything. Stay organized.
Carry Extra Cards
Have at least 2x as many SD cards as cameras. Swap them out during checks instead of deleting in the field.
Always format new cards in the camera before use—this prevents compatibility errors.
Prevent Lock Switch Issues
Check that the SD card lock switch is off. A locked card causes “blank” photo errors.
Replace damaged or bent cards immediately.
Protect Lens and Sensor from Elements
Dirt, moisture, and pests kill camera performance.
Clean Lens and Sensor Regularly
Wipe the lens, sensor window, and flash with a microfiber cloth or lens wipe every time you check. Dust and spider webs are invisible until you review photos.
Prevent Condensation
Place a desiccant pack inside the camera door. It absorbs up to 40% of its weight in moisture, preventing fogging and corrosion.
Tape it to the door if it doesn’t fit.
Block Ants and Rodents
Ants can destroy circuit boards in days. Prevent infestations with:
– A dried permethrin-sprayed cotton ball inside the camera.
– A dryer sheet (e.g., Bounce Outdoor Fresh)—safe and effective.
For bears or raccoons, use steel lock boxes.
Warning: Never use mothballs—they can damage camera components.
Minimize Human Scent and Disturbance
Every check leaves a scent trail. Reduce impact.
Check Midday or on Rainy Days
Deer are least active at midday. Use this window for maintenance.
Rainy days are ideal—precipitation washes away human scent and masks noise.
Limit Check Frequency
Visit cameras every 2–3 weeks. More frequent checks spook mature bucks.
Use cellular cameras in sensitive bedding areas to avoid physical visits.
Expert Practice: Plan checks around wind direction. Approach from downwind, wear scent-free gear, and use cover scents like pine or earth.
Track Patterns with a Digital Cam Journal
Turn photos into actionable intelligence.
Organize by Date and Location
Create a digital folder system:
– By camera location.
– Subfolders by month and year.
– Tag photos with animal ID (e.g., “Big Fork Buck”).
Use this to track movement timing, rut activity, and year-to-year patterns.
Predict Rut Timing from Fawn Sightings
Count back 200 days from first fawn sightings to estimate peak rut in your area.
Example: First fawns appear June 10 → Peak rut ~November 22.
Pro Tip: Use OnX or hand-drawn maps to plot camera locations and buck sightings annually.
Final Note: Trail cameras aren’t just scouting tools—they’re year-round knowledge engines. The hunter who reviews data, adapts strategy, and protects gear will always be one step ahead. Start applying these hunting camera tips today—your next trophy buck might already be on camera.


0 Comments