A hunting rifle that shoots straight and functions reliably under pressure is only as good as its maintenance. Knowing how to clean a hunting rifle properly isn’t just about keeping it shiny—it’s about preserving accuracy, preventing dangerous malfunctions, and extending barrel life. Over time, carbon from powder residue and copper from bullet jackets build up in the bore, degrading performance and potentially causing pressure spikes or even catastrophic failures. Left uncleaned, fouling can shift your point of impact just enough to miss a once-in-a-lifetime shot. This comprehensive guide walks you through every step—from essential tools and solvents to precision cleaning routines, common mistakes, and long-term care—so you can maintain peak performance with confidence.
Use the Right Cleaning Tools for Maximum Protection
Choose a One-Piece Cleaning Rod
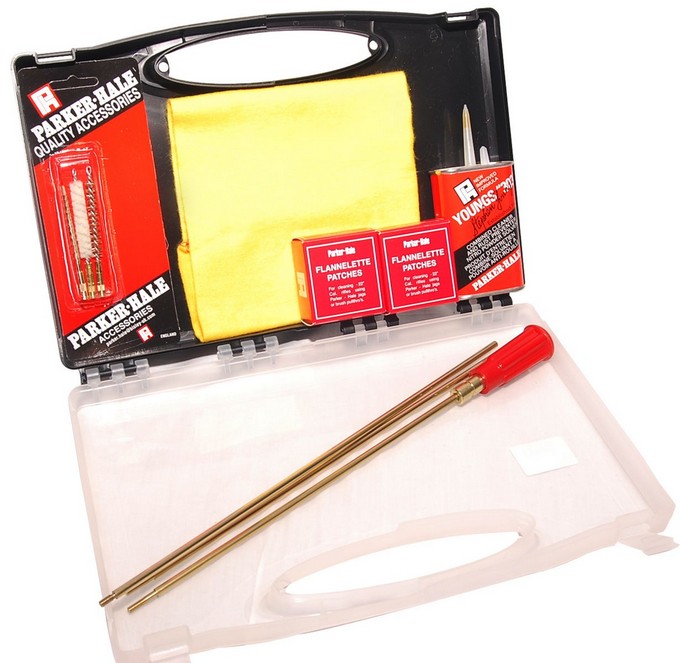
Always use a one-piece carbon fiber or coated stainless steel rod. Multi-piece steel rods have joints that can misalign and scratch the rifling, especially if forced. A seamless rod glides smoothly through the bore, minimizing contact and reducing wear. Top brands like Tipton, Dewey, and Parker Hale offer durable rods with rotating handles that prevent twisting and reduce stress on the barrel.
Pro Tip: Never use uncoated steel rods for routine cleaning—they’re too abrasive and can damage the bore over time.
Install a Caliber-Specific Bore Guide
When cleaning from the breech (the recommended method), always use a bore guide matched to your rifle’s caliber. It centers the rod and seals the chamber, preventing solvents from leaking into the action, trigger assembly, or bedding. Brands like PMA Tool, Brownells, and Tipton make reliable guides with O-rings for a snug fit.
Visual Cue: If solvent drips near the bolt or trigger after cleaning, you likely skipped the bore guide—this can lead to corrosion and function issues.
Use Stainless Steel Jags and Replace Patches
Brass jags are common but risky. If left attached and pulled back through the muzzle, they can strike and damage the crown—the precise end of the barrel where the bullet exits. Stainless steel jags avoid false copper readings during inspection and are less likely to cause harm. Always remove the jag before retracting the rod.
Best Practice: Wrap patches around a slightly undersized brush instead of using a jag. This reduces crown impact risk and improves contact with bore walls.
Select the Right Bore Brush: Nylon Over Bronze
For most hunters, a nylon bore brush is safer than bronze. While bronze brushes aggressively remove carbon and copper, they can wear the throat—the most critical part of the barrel—over time. Precision builders like Gunwerks prefer nylon for routine cleaning. Match the brush exactly to your caliber and replace it every 2–3 cleanings.
Warning: Never pull a bronze brush back through the muzzle. Push it through, unscrew it, and remove it before retracting the rod.
Control Splatter and Use Fresh Patches
Use lint-free, caliber-specific patches and never reuse them. Old patches hold grit that scratches the bore. To contain solvent splatter and fumes, place a capped water bottle or commercial splatter box over the muzzle during cleaning.
Choose the Correct Solvents for Your Fouling Type

Remove Carbon Residue First
After firing, carbon from burned powder coats the bore. Use a dedicated carbon solvent like Hoppes No. 9, Bore Tech C4, or KG #1. Soak a patch or brush, push it through, and let it dwell briefly.
Sign of Fouling: The first patch comes out dark gray or black—this confirms carbon buildup.
Address Copper Fouling with Care
Copper fouling appears as a blue-tinged patch. For deep cleaning, use Sweet’s 7.62 (ammonia-based) or Bore Tech CU+2 (non-ammonia). Ammonia solvents are powerful but must never be left to dry—they can corrode the bore. Non-ammonia options are safer for frequent use but rely more on brushing.
Dwell Time: Let copper solvent sit 15–30 minutes for full effectiveness.
Reserve Abrasive Cleaners for Severe Cases
Only use KG #2 Bore Polish or similar abrasive compounds for carbon rings—never for regular cleaning. These act like fine lapping paste and can shorten barrel life if overused. Save them for suppressed rifles or high-round-count barrels.
Red Flag: A sudden velocity spike or stiff bolt lift may signal a carbon ring forming just forward of the chamber.
Apply Lubricants and Protection Strategically
Use Gun Oil Sparingly
After cleaning, apply a thin film of REM Oil or Bore Tech to prevent rust. Run one oiled patch through, followed by 1–2 dry patches to remove excess. Too much oil in the bore affects first-shot accuracy and can attract dirt.
Rule of Thumb: You should feel the oil, not see it.
Switch to Dry Lube in Cold Weather
In freezing conditions, oils thicken and slow bolt operation. Use Teflon-based dry lubes on the bolt body and action. They resist gelling and maintain smooth function.
Grease High-Stress Points—Not the Lugs
Apply a tiny amount of grease to the rear of the locking lugs, but never on the lugs themselves. Oil or grease on the lugs can affect headspacing, leading to dangerous pressure issues.
Protect During Long-Term Storage
For off-season storage, use a VCI paper or light preservative. Wipe it off before shooting—some products affect cold-bore accuracy.
How Often Should You Clean Your Hunting Rifle?
Follow These Cleaning Intervals
- Every 200–400 rounds for unsuppressed rifles
- Every 80–200 rounds for suppressed rifles (fouls faster)
- End of hunting season
- Before long-term storage
- When groups open up or shift
Expert Insight: A lightly fouled (“seasoned”) barrel often shoots more consistently than a spotless one. The goal is fouling control, not sterilization.
Avoid Over-Cleaning
More barrels are ruined by excessive brushing than neglect. Aggressive cleaning wears the throat, reducing accuracy and lifespan. Clean only when necessary—not after every hunt.
Step-by-Step: How to Clean a Hunting Rifle
1. Unload and Secure the Rifle
Ensure the rifle is unloaded. Remove the bolt and visually inspect the chamber. Place the rifle in a gun vise with the muzzle angled downward to prevent solvent from running into the action. Cover the stock and scope lenses with cloth or tape.
Safety Check: Always treat the rifle as if it’s loaded—even during cleaning.
2. Insert the Bore Guide
Place a caliber-specific bore guide into the chamber. This aligns the rod and keeps solvents out of the action.
3. Run Carbon Solvent Patches
Soak a patch in carbon solvent, attach it to a jag, and push it through from breech to muzzle. Repeat 2–4 times until patches come out mostly clean.
Never reverse the rod in the barrel—this can scrape the rifling.
4. Scrub with a Bore Brush
Soak a nylon or bronze brush in carbon solvent. Push it through, then perform 20–50 back-and-forth strokes. Push it all the way out, unscrew it, and remove it before pulling the rod back.
Time Estimate: 3–5 minutes per brush cycle.
5. Dry the Bore
Run 2–3 dry patches through. Continue until they come out with minimal staining. Some light discoloration is normal.
6. Treat Copper Fouling (Periodic)
Soak 2–3 patches in copper solvent and push them through. Let the solvent dwell for 15–30 minutes. Run a patch:
- Blue tint = copper still present → repeat
- No blue = clean
Agitate with a brush if needed. Flush with dry patches, then a solvent patch, then dry again.
Critical: Never let ammonia-based solvents dry in the bore.
7. Final Oil and Dry Pass
Run one patch with light gun oil through the bore. Follow immediately with 1–2 dry patches to remove excess. You want a microscopically thin protective layer.
Try the Gunwerks 60-40-20 Precision Cleaning Method

This elite protocol balances deep cleaning with bore preservation.
- 60 strokes with KG #1 Carbon Remover (20 strokes × 3 sets)
- 40 strokes with KG #12 Copper Remover (20 strokes × 2 sets)
- Optional 20 strokes with KG #2 Bore Polish (suppressed rifles only)
- Final flush with gun degreaser
- 4–5 dry patches
Pro Tip: Fire 3–5 “foul shots” after this deep clean to re-season the barrel and stabilize accuracy.
Clean the Chamber, Bolt, and Throat Too
Clean the Chamber
Wrap a dry patch around a slightly oversized brush and gently twist it in the chamber. Use a chamber mop to remove debris. Spray degreaser through the bore guide to flush out leftover solvents.
Why It Matters: Carbon in the chamber affects headspacing and pressure.
Maintain the Bolt
Disassemble the bolt if possible. Spray degreaser into the firing pin tunnel and wipe clean. Use a toothbrush for stubborn grime. Lubricate lightly:
- Mild climates: Light oil on firing pin
- Subzero temps: Leave dry to prevent freeze-up
- Rear of locking lugs: Light grease (not on lugs)
Inspect the Throat
The throat erodes first. Look for pitting or asymmetry with a bore light. Severe wear means it’s time to consider rebarreling.
Prevent and Remove Carbon Rings
What Causes Them?
Frequent firing, especially with suppressors, traps unburned powder just forward of the chamber. It hardens into a ring that constricts the bore.
Symptoms
- Sudden high-velocity shots
- Chronograph spikes (+30–50 fps)
- Stiff bolt lift
- Brass shavings when opening
- Blown primers (worst case)
Prevent With Regular Cleaning
- Clean suppressed rifles every 80–200 rounds
- Use the Gunwerks 60-40-20 routine
- Focus extra attention on the throat area
Remove With Bore Polish
Apply KG #2 Bore Polish to a brush and work it into the throat. Repeat until the ring breaks up. Follow with a full cleaning cycle.
Care for Your Scope Lenses
What Not to Use
Avoid t-shirts, paper towels, or rubber smudge tools. They trap grit and scratch lenses.
Proper Cleaning Steps
- Brush off loose dust.
- Hold scope horizontally.
- Spray solution liberally—let it run off, carrying debris.
- Wipe smudges gently with lens tissue.
- Replace lens covers immediately.
Warning: Scratches may not show until sunlight creates glare.
Field and Storage Best Practices
Fire Foul Shots After Cleaning
After a deep clean, fire 3–5 rounds before hunting. This re-seasons the bore and stabilizes point of impact.
Log It: Track how many shots it takes for groups to tighten.
Store Safely
- Keep in a cool, dry place
- Use a gun sock or case to block dust
- Apply light oil to the bore for long-term storage
- Cap all solvents tightly—evaporation ruins effectiveness
Avoid These 9 Common Cleaning Mistakes
| Mistake | Risk |
|---|---|
| Multi-piece steel rods | Scratches rifling at joints |
| Cleaning from the muzzle | Damages crown during insertion |
| Leaving ammonia solvent too long | Corrodes bore |
| Over-oiling the bore | Hurts first-shot accuracy |
| Skipping the bore guide | Solvent leaks into action |
| Reusing patches | Grit buildup scratches bore |
| Ignoring the chamber | Affects chambering and pressure |
| Over-cleaning | Wears throat, shortens barrel life |
| Mixing solvents | Risk of chemical reaction or corrosion |
Final Note: A properly cleaned hunting rifle delivers consistent accuracy, long service life, and reliable performance in the field. By following these expert-backed steps—using the right tools, solvents, and timing—you protect your investment and ensure every shot counts. Remember: precision beats perfection. Clean when needed, not obsessively, and your rifle will serve you for generations.


0 Comments