You’ve made the shot. The stillness returns. Now comes the real test—not of marksmanship, but of strength, strategy, and respect for the animal: how to transport deer after hunting. Whether you’re miles from your truck in the Colorado Rockies or deep in the Pennsylvania woods, getting your harvest out safely and legally is just as important as the hunt itself.
Every year, thousands of hunters face this challenge without mechanical help. But with the right techniques, even a 200-pound buck can be moved efficiently on foot, by bike, or in a compact car. From dragging and backpacking to hitch carriers and unconventional hacks like rolling or floating, there are proven methods for every situation.
In this guide, you’ll learn how to choose the best way to move your deer based on terrain, gear, and distance. You’ll discover essential field care steps, avoid common mistakes that spoil meat, and understand legal rules—especially in Chronic Wasting Disease (CWD) zones. Whether you hunt solo or with a partner, in thick timber or open tundra, this is your complete roadmap for transporting deer after hunting.
Field Dress, Cool, and Tag Before Moving
Before you even think about transport, three critical tasks must be done at the kill site—field dressing, cooling, and tagging. Skipping any of these risks meat spoilage, disease exposure, and legal trouble.
Field Dress the Deer Within 30 Minutes
Begin field dressing as soon as possible, especially in warm weather. This removes the internal organs, which speeds cooling and reduces weight by up to 20%. Use a sharp fixed-blade knife to make a clean incision from the base of the pelvis to the sternum. Be careful not to puncture the intestines or bladder.
Remove the heart, lungs, and gastrointestinal tract. Wipe the cavity with a clean cloth if available. Keep the stomach and intestines intact—many states require them to remain with the carcass until processing.
Pro Tip: Hang entrails in a game bag from a tree away from your meat cache to avoid attracting scavengers.
Cool the Carcass Immediately to Preserve Meat
Heat ruins venison fast. Prop the body cavity open with a stick or game pole to allow airflow. In warm climates, pack snow or ice inside the cavity. Never cover the deer with a non-breathable tarp—this traps heat.
Aim to keep meat below 40°F (4°C). In hot conditions (above 50°F), consider deboning on the spot to reduce spoilage risk.
Warning: Leaving a dressed deer in direct sunlight for over an hour can ruin the meat—even in fall.
Tag the Deer Right After Harvest
Most states require immediate tagging. Attach your tag according to local laws—usually near the ear or leg. Do not move the deer until it’s properly tagged.
In CWD zones, transport rules are strict:
– Whole carcasses often cannot cross state lines.
– Only boned-out meat, skull plates without brain tissue, or cleaned capes are allowed.
– Skulls must be boiled or pressure-washed to remove neural material.
Always carry your hunting license and tag when moving the deer.
Choose the Best Transport Method for Your Situation

Your best option depends on distance, terrain, gear, and physical ability. Here’s how to pick the most effective method.
Dragging the Deer: Best for Short, Flat Routes
Dragging works well for distances under one mile on open or moderate terrain.
Pull by Hind Legs or Antlers
Tie the hind legs together with paracord or nylon rope. Drag feet-first to reduce dirt contact. In snow, pull by the antlers—the rack acts like a natural sled.
Avoid: Pulling by the neck—it can tear meat and damage the spine.
Use a Plastic Sled or Game Cart
A plastic sled glides easily over snow and reduces friction. On dry ground, a two-wheeled game cart with wide, puncture-resistant tires is ideal. Secure the deer with bungee cords to prevent shifting.
Limitation: Carts struggle in thick brush or steep slopes. Getting a heavy deer onto the cart solo is often the hardest part.
Backpack the Deer Out in Sections
Packing out on foot is common in remote hunting areas. Breaking the deer into carryable pieces makes retrieval manageable—even alone.
Quarter the Deer for Easier Carry
Cut the deer into four main sections:
– Two hindquarters (35–45 lbs each)
– Two front quarters (20–30 lbs)
– Remove backstraps and tenderloins first
Use breathable game bags to protect meat from dirt, insects, and moisture. Hang unused quarters in a tree using a bear-resistant rope system while making multiple trips.
GPS Tip: Mark your kill site and cache spots with a hunting app like HuntStand.
Debone the Meat to Cut Weight by 40%
Deboning removes bones, fat, and inedible tissue, reducing the load significantly. A mature buck yields about 75 lbs of meat; a doe about 45 lbs.
Use a replaceable-blade knife (like Outdoor Edge Razor-Lite) and a boning knife. Work skin-side down, cutting along muscle seams. Bag each section in gallon-sized freezer bags.
Time Estimate: Deboning takes about 1 hour without caping.
Carry With a Proper Hunting Backpack
Choose a pack with 2,500–4,500 cubic inches of capacity. Look for:
– Padded waist and shoulder straps
– Compression straps
– External attachment points for antlers or capes
– Optional meat shelf for stability
Warning: A daypack is insufficient. You’ll strain your back and risk dropping meat.
Carry Without Gear: Field-Tested Techniques
When you have no tools, ingenuity becomes your best asset.
Shoulder the Deer for Short Distances
Drape the deer over one shoulder with hind legs forward, front legs down your back. Lean slightly forward to shift weight onto your hips. Keep your arms free to balance.
Best for distances under 0.5 miles. Works well for deer under 150 lbs field-dressed.
Pro Tip: Use a belt or strap around your chest to secure the legs.
Use a Two-Person Carry
One hunter holds the front legs, the other the hind legs. Walk in sync, keeping the deer low and balanced. This method reduces individual strain and improves control on rough ground.
Ideal for: Heavy bucks or steep terrain.
Make a Sling from Clothing or Belt
Tie a long shirt, belt, or paracord between the hind legs and loop it over your shoulder. Creates a makeshift harness for single-shoulder carry.
Survival Hack: Even a torn shirt can be used to create a carrying aid.
Advanced Carrying Methods for Extreme Conditions

These specialized techniques are used by experienced hunters in remote or rugged terrain.
Build a Shock Pouch from the Hide
Also known as the “mountain man carry,” this turns the hide into a backpack.
- Remove the lower leg bones (shanks), leaving hide and dewclaws.
- Tie front leg hide to opposite back leg hide with a square knot.
- Repeat on the other side—creates two natural straps.
- Slide arms through and stand up.
The dewclaws prevent slipping. The hide cushions your shoulders.
Limitation: Hard to stand with loads over 150 lbs. Best for younger, stronger hunters.
Use Zip Ties as Backpack Straps
Fast and lightweight:
– Connect left front to left rear leg with heavy-duty zip ties.
– Repeat on the right side.
– Slide arms through the loops and carry like a backpack.
No skill required—just strong zip ties.
Hunters say: “It’s like wearing the deer like a school backpack.”
Ride a Deer Bike Out
If you brought a mountain bike, strap the gutted deer to it:
– Head over handlebars
– Front legs in water bottle cages
– Secure with bungees
Only practical on trails or fire roads.
Caution: Don’t attempt on public roads or crowded trails.
Float the Deer Downstream
Deer hair is hollow and buoyant—the carcass floats naturally. In shallow rivers with mild current, drag the deer downstream at night using a headlamp.
Safety Rule: Only try this in water you know well. Never float alone.
Roll the Deer Downhill
Common in snowy or steep terrain (e.g., Norway). Let gravity do the work.
Humorous bonus: “Hits the bottom already tenderized.”
Use Vehicles and Mechanical Help
When terrain allows, mechanical assistance saves time and effort.
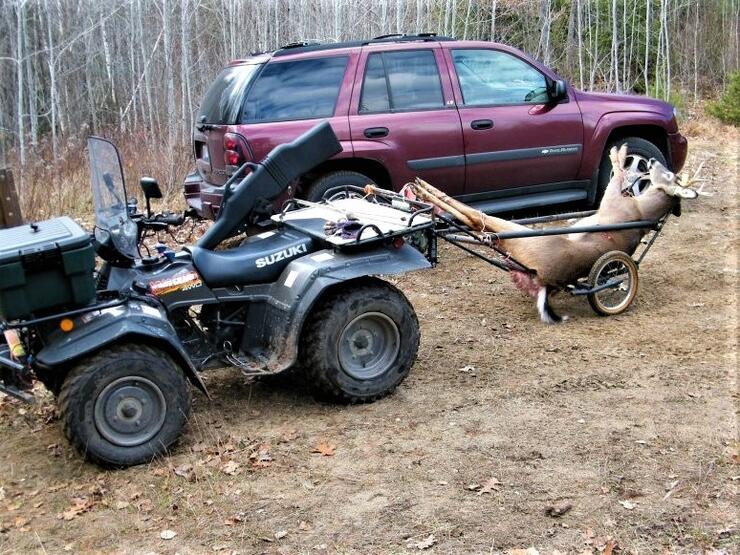
ATV or UTV to the Kill Site
Drive directly to the deer if trails permit. Load it into the bed or tow behind on a sled. Secure with ratchet straps to prevent shifting.
Advantage: Fastest method where accessible.
Horse or Pack Animal for Backcountry
Quarter the deer and saddle-load onto a mule or horse. Requires animal handling skills but is highly effective in remote zones.
Traditional method: Still used in Alaska and parts of Canada.
Truck or Trailer for Final Transport
Use ratchet straps and a heavy-duty tarp to secure the deer in the truck bed. Line with moving blankets to protect against blood stains.
Transport in Compact Cars
No truck? No problem. Many hunters use sedans, hatchbacks, and SUVs successfully.
Fit Deer in the Trunk
Line the trunk with a heavy-duty tarp and old towels. Place the deer ¾ of the way in so the lid closes. Use bungee cords to secure the trunk if it won’t latch.
Success Stories:
– 2000 Honda Insight → one large doe
– 1999 Toyota Corolla → big Iowa bucks
– 2008 Chrysler Sebring → with tarp and blanket combo
Use a Hitch-Mounted Cargo Carrier
Attach a 500-lb capacity carrier to a 2″ hitch. Models like Maxx Haul fit quarters, ice, and gear.
Lock it with a Master Lock hitch lock to prevent theft.
Best for: Hunters without trucks but with SUVs or minivans.
Roof Transport (Use with Caution)
Roof-top carriers or metal grates can hold bagged meat. But:
– May draw public disapproval
– Risk of wind damage or theft
– Illegal in some areas
Alternative: Rent a trailer from U-Haul for one-time use.
Prepare for Taxidermy and Caping
If you want a trophy mount, handle the head and hide carefully.
Cape the Deer in the Field
Use the tube-sock method:
1. Cut behind front legs in a circle.
2. Skin toward the head, keeping hide intact.
3. Cut around the neck joint to detach the skull.
4. Fold cape skin-to-skin and keep cool in a game bag.
Taxidermy Tip: Most professionals prefer this method.
Transport the Skull Legally
In CWD zones:
– No brain or spinal tissue allowed.
– Skull must be boiled or pressure-washed.
– Cape-only transport is safest.
Final Tips for Success
- Plan before shooting: If you can’t retrieve it, don’t take the shot.
- Stay in shape: Carrying 50–80 lbs builds endurance fast.
- Hunt with a partner: Two people make retrieval safer and faster.
- Use GPS: Prevent disorientation in dense woods.
- Respect the animal: Minimize meat damage and waste.
- Clean your vehicle: Use odor-neutralizing sprays after transport.
Remember: “The work starts when you pull the trigger.”
With the right preparation and mindset, transporting your deer—no matter the distance or terrain—is not just possible, it’s part of the hunt. And when that venison feeds your family for months, every mile hauled is worth it.


0 Comments