A sharp hunting knife isn’t just a tool—it’s your most trusted ally in the wild. Whether you’re skinning a deer at dawn, slicing through sinew, or preparing a quick meal at camp, a razor-sharp edge makes every cut safer, faster, and more precise. Dull blades slip, tear meat, and demand excessive force, increasing fatigue and the risk of injury. The good news? You don’t need years of experience to sharpen like a pro. With the right tools, consistent technique, and a few minutes of regular maintenance, you can keep your blade performing at its peak. This guide covers everything from full at-home restoration to quick field touch-ups, so you’re never caught with a blunt edge when it matters most.
Choose the Right Sharpening Tool for Your Needs
Match the Tool to Your Environment
The first step to sharpening success is selecting the right tool for where you are—home or in the field. At home, you have time, space, and lighting to fully restore your edge. In the field, speed, reliability, and portability are essential.
At-home tools—like whetstones, guided systems, or belt grinders—offer precision, full edge control, and the ability to repair nicks or reset bevels. Field tools should be compact, rugged, and angle-specific, such as guided pocket sharpeners or diamond rods.
Using the wrong tool can ruin your blade’s geometry. Always match your sharpener to your knife’s factory angle.
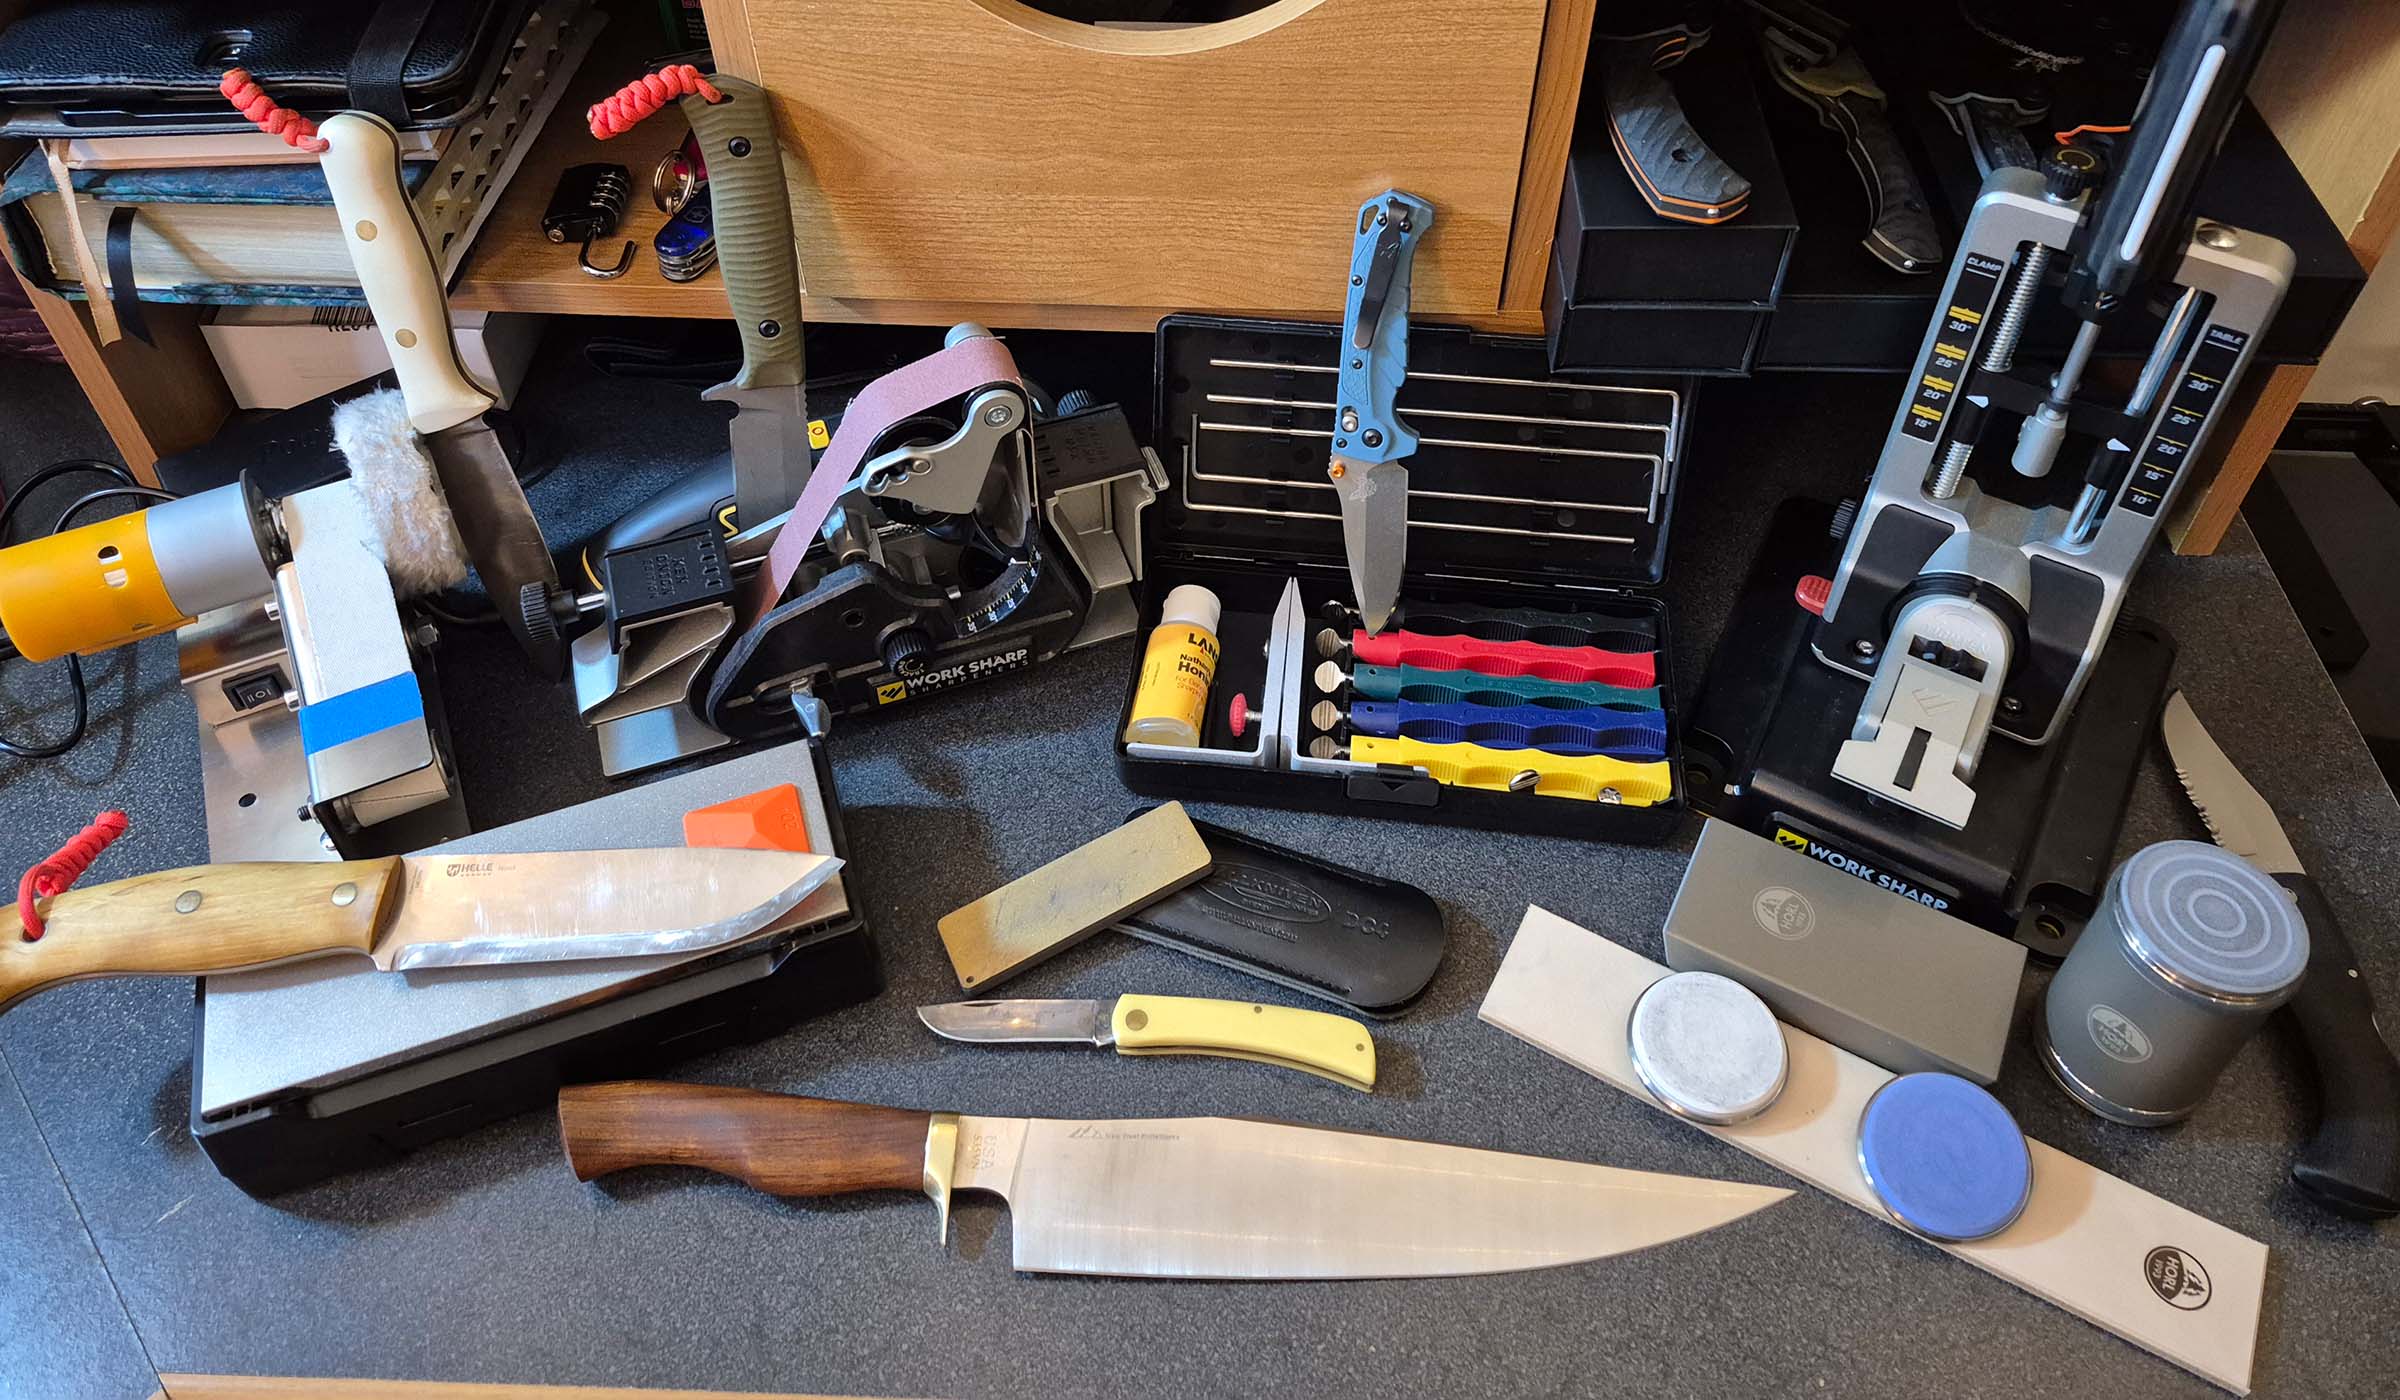
Top Recommended Sharpeners for Hunters
Guided Field Sharpeners
- Work Sharp Folding Field Sharpener™, Ken Onion MK.2
- Built-in 17°, 20°, or 25° guides ensure perfect consistency
- Combine diamond, ceramic, and leather strop for a full sharpening workflow
- Ideal for maintaining high-end steels like S30V, MagnaCut, or M390
Diamond Stones & Plates
- Smith’s 2.5″ x 8″ fine-grit diamond plate
- Cuts faster than water stones, especially on hard modern steels
- No soaking required—use dry or with water
- Extremely durable and long-lasting
Pocket Sharpeners
- Smith’s PP1: Carbide slot for emergency repair, ceramic for honing
- Lightweight, under $10, lanyard-ready
- Best for field touch-ups—not for full sharpening
Stone Systems
- Lansky Kit: Adjustable rods, foolproof for beginners
- Spyderco Sharpmaker: Ceramic rods, easy indexing
- Smith’s EDGESPORT: Coarse/fine diamond + Arkansas stone
Avoid flimsy tools. A quality sharpener protects your blade and pays for itself in edge longevity.
Know Your Knife’s Edge Angle
Standard Angles for Hunting Knives
The sharpening angle—measured per side—determines how sharp and durable your edge is. Most hunting knives fall between 17° and 25°.
- 17°: Thin, precise—perfect for delicate skinning (e.g., MKC Speedgo)
- 20°: Balanced performance—ideal for general field dressing (e.g., Benchmade Steep Country)
- 25°: Heavy-duty—resists rolling during batoning or bone contact
Never guess the angle. Match your sharpener to your knife’s factory grind.
Use Angle Guides or Simple Visual Aids
If your tool lacks a built-in guide:
– Fold a piece of paper into quarters: each fold is ~22.5°—close to 20° or 25°
– Adjust slightly to hit your target angle
– Practice on an old blade first
For micro-bevels, sharpen the primary bevel at 20°, then add a secondary 22°–25° micro-bevel. This strengthens the edge without sacrificing sharpness.
Consistency beats perfection. A steady 20° is better than erratic “perfect” angles.
Prepare Your Knife and Tools
Clean the Blade Before Sharpening
Dirt, blood, and fat create a barrier between steel and abrasive. Always wipe the blade with a clean cloth. For stubborn residue:
– Soak in warm, soapy water
– Scrub gently with a soft brush
– Dry thoroughly to prevent rust
Secure Your Sharpening Surface
Place stones or diamond plates on a non-slip surface:
– Rubber mat
– Damp cloth
– Suction base stone
A moving stone leads to uneven pressure and a poor edge.
Lubricate as Needed
- Water stones: Soak 10–15 minutes before use
- Oil stones: Apply honing oil
- Diamond plates: Use dry or with water to reduce heat
Lubrication prevents clogging and overheating.
At-Home Sharpening: Full Edge Restoration
Start with a Coarse Grit
Use a coarse diamond plate or 600-grit stone to repair nicks and re-establish the bevel.
- Place the blade heel on the stone at the correct angle
- Draw backward in a sweeping arc from heel to tip
- Apply even, moderate pressure—don’t press too hard
- Repeat 10–15 times per side
Focus on maintaining a consistent angle, not speed.
Feel for the Burr
A burr is a thin wire of folded metal on the opposite edge—your signal that the bevel has formed.
- Test by running your finger perpendicular to the edge
- A burr feels like a slight catch or roughness
- Once it forms along the full edge, flip and repeat on the other side
Alternate Sides Until Burr Is Even
- Continue alternating strokes
- Reduce pressure as the burr develops
- Goal: A consistent burr from tip to heel
If no burr forms, slightly increase your angle or check for flat spots.
Switch to Fine Grit
Move to a 1000+ grit stone or fine diamond plate:
– 10–15 strokes per side
– Goal: Refine the edge and remove the burr
– Use lighter pressure
Finish with a Strop
Stropping polishes the edge and removes micro-burrs.
- Use a leather belt or built-in strop
- Apply stropping compound (chromium oxide or resin)
- Draw the blade backward, edge trailing
- 10–20 strokes per side
Stropping is the chef’s secret. It turns “sharp” into “shaving-sharp.”
Field Sharpening: Quick Touch-Ups That Work

Touch Up Early, Touch Up Often
Waiting until the blade feels dull is too late. Instead:
– Hone every 20–30 minutes of use
– Stop at the first sign of resistance
– Spend just 20–30 seconds per session
Prevention beats correction. A sharp knife stays sharp longer.
Use a Guided Sharpener in the Field
- Insert blade into the 20° guide
- Use ceramic rod or fine diamond for maintenance
- Stroke 5–10 times per side
- Finish with the leather strop
For dull blades, start with coarse diamond:
– 3–4 slow, controlled strokes per side
– Alternate sides
– Finish with fine and strop
Entire process takes under 5 minutes.
Special Cases: Convex and Serrated Edges

Sharpen Convex Edges Properly
Convex grinds (e.g., Falcon E1) have a rounded profile—never use flat stones.
- Use round ceramic rods or flexible diamond strips
- Maintain contact along the curve
- Lift your elbow slightly at the tip to preserve the angle
A flat stone will flatten a convex edge over time.
Sharpen Serrated Knives Correctly
Serrations need specialized tools:
– Diamond-coated rod or tapered file
– Match the rod to the serration size
– Insert into each gullet and stroke 5–10 times
For the plain edge, use a stone or ceramic rod at the same angle.
Don’t try to flatten serrations. Work within the existing bevel.
Avoid These Common Sharpening Mistakes
❌ Never Use Pull-Through Sharpeners
Carbide pull-through models:
– Shear metal unevenly
– Round the tip
– Create burrs and micro-chips
– Destroy blade geometry
Fine for cheap kitchen knives—brutal on premium hunting blades.
❌ Don’t Use Inconsistent Angles
Switching angles creates a “Christmas tree” edge—weak and uneven.
- Stick to one angle per session
- Use guides or consistent hand position
❌ Don’t Overheat the Blade
Grinding too long or too hard can ruin the steel’s temper.
- Work in short bursts
- Let the blade cool
- Use water or oil to dissipate heat
Discoloration (blue or yellow) means you’ve overheated it.
Test Your Edge’s Sharpness
Paper Test
Hold a sheet vertically. Slice downward:
– Sharp: Cuts cleanly, grabs paper
– Dull: Pushes, tears, or deflects
The gold standard for edge performance.
Arm Hair Test
Gently draw the blade across arm hair:
– Sharp: Shaves cleanly
– Dull: Slides or tugs
Not for the squeamish—but highly effective.
Fingernail Test (Burr Check)
Draw the blade backward across your fingernail:
– If one side catches, a burr remains
– Continue stropping until both sides glide equally
Quick, field-ready diagnostic.
Maintain Your Edge for Longevity
Wipe the Blade During Use
Blood, fat, and hair dull the edge fast. Wipe every few minutes with a clean cloth.
Store Clean and Dry
After use:
– Wash with mild soap
– Dry immediately
– Apply light oil if storing long-term
Sharpen Proactively
- Don’t wait for the blade to feel dull
- Hone frequently—especially in the field
- Strop daily if possible
It’s easier to keep a knife sharp than to make it sharp.
Best Practices Summary
Do:
- Match your sharpener’s angle to your knife
- Use guided tools for consistency
- Strop after every sharpening
- Clean and dry your blade regularly
- Practice on cheaper knives first
Don’t:
- Use pull-through sharpeners on quality blades
- Sharpen with inconsistent angles
- Let the blade get severely dull
- Overheat during grinding
Your knife is only as good as its edge. Treat sharpening as part of the hunt.
Final Tip: Sharpen with Confidence
Sharpening isn’t magic—it’s muscle memory. The more you do it, the better you get. Start with a simple system like the Smith’s PP1 or a Lansky kit. Master one angle. Once you can consistently produce a burr and pass the paper test, you’re ready for more advanced tools.
If your method works, stick with it. If not, try something new. The goal isn’t perfection—it’s reliability. A sharp knife saves time, preserves meat, and keeps you safe.
Stay sharp. Stay safe. Good luck this season.

0 Comments